Overview
The mantaflow framework is designed for developers and researchers in order to make it possible to test and develop new algorithms as conveniently as possible. This implies a few compromises: it’s not meant to be a tool for end-users, and as such, the user interface is definitely quite basic, and primarily designed for quick debugging. At the same time, we tried to keep the code minimal and generic. Thus, it’s not optimized to its full extent. It’s certainly quite fast, but we have stopped short of sacrificing readability of the code in favor of execution speed (it’s still not exactly trivial in many places).
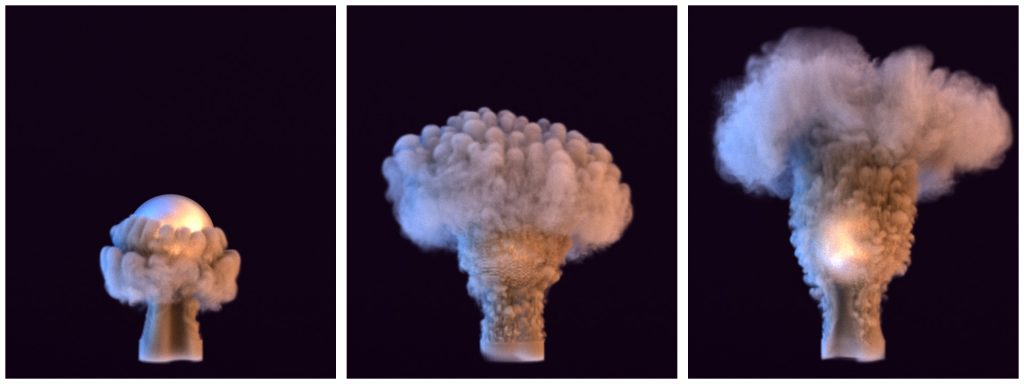
Fig. 1: This tutorial focuses on data – but to keep you interested, here’s an outlook what you could get out once you’ve dealt with all the boring memory issues…
Grids and Arrays
The most important aspect of the coupling is the exchange of data between mantaflow grids, and numpy arrays. The former is the core datatype of all fluid solvers in mantaflow, while the neural networks in tensorflow inherently use numpy arrays. While both are in the end simply dense arrays, an important difference is that mantaflow accesses grids with “grid(x,y,z)”, while numpy arrays use “array[z,y,x]”. Thus, mantaflow has a ‘lexicographic’ index order, while numpy typically follows the memory strides. This is important to keep in mind when allocating and indexing the data.
There are several python helper functions in the files ‘numpyconvert.cpp’ in order to copy data between the two. E.g., you can use copyArrayToGridReal to copy the content of a numpy array to a scalar mantaflow grid. Note that all functions require existing grids and arrays of the correct size, they won’t resize or allocate memory themselves. Also, they assume contiguous C-style memory ordering of the numpy array. If you’re unsure, better make a copy with nd.copy.
Correspondingly, there are transfer functions for the other native datatypes of mantaflow, e.g., copyGridToArrayVec3 to copy a Vec3 mantaflow grid to a numpy array. For these functions, ‘grid’ refers to a mantaflow grid, while ‘array’ means it’s numpy data.
Points and Particles
Particle data is also important for many mantaflow scenes. For these, there’s another set of functions to copy data between particle data fields (“pdata“) and numpy arrays, such as the copyArrayToPdataReal. As before, “array” denotes a numpy array. Note that you could, of course, also write your own data transfer functions along the lines of numpyconvert.cpp, and mantaflow PYTHON functions also support numpy arrays as parameters.
A full code example with an exemplary grid conversion can be found in the following code snippet. It first creates a 64 x 128 x 192 domain and allocates a scalar and vector-3 grid. Then, corresponding numpy arrays are allocated. Note that the ordering of the dimensions is swapped now: “res,res*2,res*3” from mantaflow becomes “res*3, res*2, res” for numpy, and we explicitly have to allocate a fourth dimension to determine the dimensionality of the per cell data. Then, the numpy scalar grid data is copied to mantaflow, and the mantaflow Vec3 grid data is copied to numpy. It’s awesome – both grids by default store zeros, so we’ve copied a large number of zeros back and forth 🙂 !
from manta import *
import numpy as np

res = 64
solver = Solver(name='manta', gridSize=vec3(res,res*2,res*3), dim=3)

scalar = solver.create(RealGrid)
vel = solver.create(MACGrid)

npAr = np.zeros( (res*3, res*2, res, 1), dtype='f')
npVel = np.zeros( (res*3, res*2, res, 3), dtype='f')

copyArrayToGridReal( source=npAr, target=scalar )
copyGridToArrayVec3( source=vel, target=npVel )
An example of how to work with numpy array data in C++ code can be found in source/pluings/tfplugins.cpp. The example kernel iterators over a scalar mantaflow grid, and accesses the numpy data (assuming it contains a two-dimensional grid of floating point values) from its pData pointer. The example code simply adds a single entry of the numpy data scaled by a factor onto each cell of the mantaflow grid.
KERNEL(bnd=0)
void knSimpleNumpyTest(Grid<Real>& grid, PyArrayContainer npAr, Real scale)
{
    const float* p = reinterpret_cast<float*>(npAr.pData);
    grid(i,j,k) += scale * p[j*grid.getSizeX()+i];
}
Afterwards, the kernel can be called “as usual” from a function with python bindings, or any other C++ function:
PYTHON() void simpleNumpyTest( Grid<Real>& grid, PyArrayContainer npAr, Real scale) {
    knSimpleNumpyTest(grid, npAr, scale);
}
And to conclude, below you can find a list of all data transfer functions from source/plugin/numpyconvert.cpp that are available in python scenes:
 copyArrayToGridReal(numpyArray source, RealGrid target)
 copyGridToArrayReal(RealGrid source, numpyArray target)
 copyArrayToGridLevelset(numpyArray source, LevelsetGrid target)
 copyGridToArrayLevelset(LevelsetGrid source, numpyArray target)
 copyArrayToGridVec3(numpyArray source, VecGrid target)
 copyGridToArrayVec3(VecGrid source, numpyArray target)
 copyArrayToGridMAC(numpyArray source, MACGrid target)
 copyGridToArrayMAC(MACGrid source, numpyArray target)

 copyArrayToPdataInt(PdataInt p, numpyArray n)
 copyPdataToArrayInt(numpyArray n, PdataInt p)
 copyArrayToPdataReal(PdataReal p, numpyArray n)
 copyPdataToArrayReal(numpyArray n, PdataReal p)
 copyArrayToPdataVec3(PdataVec3 p, numpyArray n)
 copyPdataToArrayVec3(numpyArray n, PdataVec3 p)